In the world of modern ecommerce, payment gateways are more than just tools for processing credit cards—they’re the engine behind every successful transaction. For Shopify merchants in the United States, Canada, the United Kingdom, and the broader European market, choosing the right payment gateway directly affects conversion rates, customer trust, profit margins, and even the long-term stability of your business.
In this comprehensive guide, we’ll walk through the most popular payment gateways for Shopify—PayPal, Stripe, Shopify Payments, and several alternatives. You’ll learn their strengths, limitations, fees, setup steps, and best practices for boosting sales while minimizing payment failures. Whether you’re launching your first ecommerce store or optimizing your existing DTC brand, this article will help you build a solid payment infrastructure that works seamlessly for customers across the Western market.
Why Payment Gateways Matter for Ecommerce Success
Before diving into setup instructions, it’s important to understand why payment gateways are so critical for online business success.
They directly influence checkout conversion rates
Studies consistently show that customers abandon carts when they don’t see their preferred payment method. In fact, nearly 40% of shoppers in Western markets will leave a store if their go-to payment option—PayPal, credit card, or a BNPL platform—doesn’t appear during checkout.
They affect customer trust
Some payment logos, such as PayPal or Apple Pay, instantly boost perceived security. A familiar logo can make a customer feel safe enough to proceed, especially with new or lesser-known brands.
They impact your profit margins
Transaction fees differ between payment gateways and between regions. Choosing the best fit for your business model can save thousands of dollars annually.
They determine how you receive your money
Payout speed is crucial for cash flow. Some payment processors pay within 24–48 hours, while others may take up to 7 days.
They influence the risk of account holds or freezes
PayPal is known for strict risk controls; Stripe and Shopify Payments also monitor chargebacks and suspicious activity. The wrong setup can result in unexpected disruptions.
A good payment strategy balances customer convenience, business risk management, and profitability.
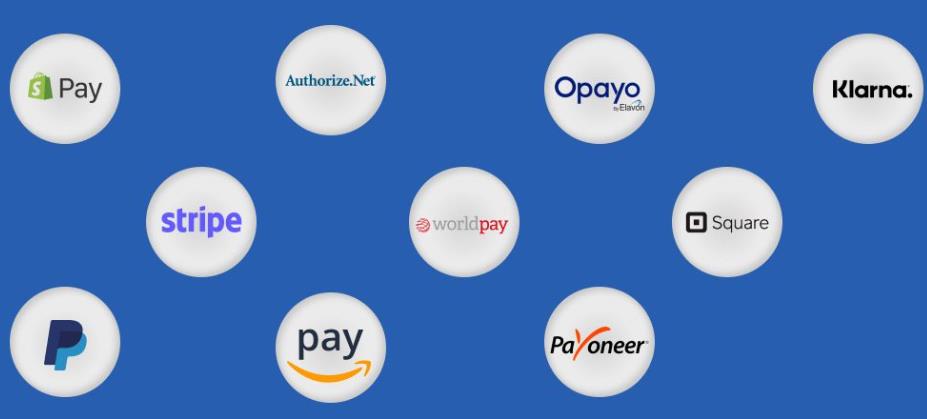
Overview of Payment Gateway Options in Shopify
Shopify supports both its native payment system and a large variety of third-party gateways. Here’s a quick overview of the most common ones used in Western markets:
Shopify Payments
Shopify’s native gateway powered by Stripe. Available in many countries, including the U.S., UK, EU, Australia, and Canada. Often the most convenient choice for merchants.
PayPal
PayPal Express Checkout or PayPal Payments Pro. Highly trusted in the U.S. and EU. A must-have for most brands.
Stripe
A flexible gateway with powerful APIs, excellent global support, and strong fraud detection. Often chosen by SaaS or tech-minded merchants.
Amazon Pay
Popular among U.S. shoppers who trust the Amazon ecosystem.
Digital Wallets
Apple Pay, Google Pay, and Shop Pay improve mobile conversion dramatically.
Buy Now Pay Later (BNPL) Providers
Great for high-ticket products:
- Klarna
- Afterpay
- Affirm
- Sezzle
Local European Payment Methods
For merchants selling into the EU:
- iDEAL (Netherlands)
- Bancontact (Belgium)
- Sofort (Germany)
- Giropay (Germany)
The more relevant payment options you offer, the higher your checkout completion rate will be.
Shopify Payments: Pros, Cons, and Setup Guide
Shopify Payments is usually the simplest and most seamless option—if it’s available in your country.
Pros
- Fully integrated with Shopify (no redirects)
- Lower overall fees compared to third-party gateways
- Accepts major credit cards + digital wallets
- Works seamlessly with Shop Pay (extremely high conversion)
- Faster payouts than many external processors
- Chargeback management built into Shopify
Cons
- Not available in all countries
- High-risk products are prohibited
- Stripe handles backend risk review, which can result in unexpected holds
- Some industries may face stricter review (supplements, adult items, etc.)
Supported Countries
Shopify Payments is available in:
- United States
- Canada
- United Kingdom
- Most of the EU
- Australia
- New Zealand
- Singapore
- Japan
(If Shopify Payments is available in your country, Stripe cannot be used as an alternative.)
How to Set Up Shopify Payments
- Go to Settings → Payments in your Shopify admin.
- Click Activate Shopify Payments.
- Enter required business information:
- Business type
- Employer ID (for U.S. merchants)
- Banking details
- Personal identity information
- Choose your payout schedule (daily, weekly, or monthly).
- Review the payment fees and confirm.
Once activated, credit card payments and Shop Pay are immediately enabled.
PayPal on Shopify: Setup, Benefits, Limitations, and Best Practices
PayPal is one of the most trusted online payment methods in the Western world. Many customers, especially older demographics, prefer paying through PayPal for added protection.
Why PayPal Is Essential
- Very strong brand recognition
- High trust level for first-time store visitors
- Offers buyer protection
- Helps reduce abandoned carts
- Works well for international customers
Limitations
- Higher transaction fees compared to credit card processors
- PayPal reserves and holds can occur
- Chargebacks can be more challenging
- Some customers experience redirects away from your website
Types of PayPal for Shopify
- PayPal Express Checkout (best for most stores)
- PayPal Payments Standard
- PayPal Payments Pro (U.S. only, full custom checkout)
How to Set Up PayPal on Shopify
- In Shopify admin, go to Settings → Payments.
- Shopify may pre-activate PayPal Express using your store email.
- Log in to PayPal Business (upgrade if necessary).
- Connect your PayPal account.
- Configure payout currency and preferences.
- Add branding to your PayPal checkout page.
Avoiding PayPal Freezes or Holds
PayPal is strict with risk management. To reduce the chance of funds being held:
- Use a verified PayPal Business Account
- Upload business documents and tracking information
- Keep chargebacks low
- Avoid sudden spikes in transaction volume
- Add clear refund and shipping policies to your website
- Respond to disputes quickly
PayPal is worth enabling, but it must be managed properly.
Stripe: Why Many Merchants Prefer It
Stripe is one of the most powerful and flexible payment gateways in the world. Though Shopify Payments uses Stripe behind the scenes, some merchants still choose Stripe directly if Shopify Payments isn’t available.
Benefits of Stripe
- Works in over 40 countries
- Very clear risk management
- Excellent support for recurring billing
- Compatible with Apple Pay and Google Pay
- Smooth mobile checkout
- Ideal for tech-heavy brands or subscription models
- Lower risk of sudden account holds compared to PayPal
Downsides
- Cannot be used if your country supports Shopify Payments
- Requires more manual configuration
- Fees are similar to Shopify Payments
- Disputes can still be costly
How to Connect Stripe to Shopify
- Go to Settings → Payments.
- Locate Third-party payment providers.
- Select Stripe from the list.
- Log into your Stripe dashboard.
- Connect and authorize the integration.
- Configure currencies and payout settings.
Once activated, Stripe handles all credit card transactions for your store.
Alternative Payment Gateway Options for Western Countries
Although Shopify Payments, PayPal, and Stripe cover most needs, many brands benefit from offering additional payment options.
Buy Now, Pay Later Options
BNPL improves conversion for high-ticket items.
Klarna
Very popular in Europe and growing fast in the U.S.
Afterpay / Clearpay
Huge adoption in the U.S., UK, and Australia.
Affirm
Used mainly in the U.S. for larger purchases.
Amazon Pay
Great for customers who trust Amazon’s checkout experience.
Especially effective for U.S. shoppers.
Authorize.net
Traditional credit card processor widely used in the U.S.
Local European Payment Methods
- iDEAL (Netherlands)
- Sofort (Germany)
- Bancontact (Belgium)
- Giropay (Germany)
If selling in Europe, offering local payment options can significantly boost conversion.
How to Choose the Right Payment Gateway for Your Shopify Store
Choosing the right gateways depends on your market, product type, customer behavior, and risk tolerance.
1. Based on Target Regions
- U.S. & Canada: Shopify Payments + PayPal + Shop Pay + Apple Pay
- UK & EU: Shopify Payments + PayPal + Klarna/iDEAL
- Australia: Shopify Payments + Afterpay
- High-risk industries: Stripe (if available) + specialized providers
2. Based on Pricing
If minimizing fees is a priority, Shopify Payments typically has the best rates.
3. Based on Product Type
High-ticket products benefit from BNPL options like Klarna or Affirm.
4. Based on Customer Behavior
If your customers are mobile-heavy, Apple Pay and Google Pay are essential.
5. Based on Cash Flow Requirements
Need fast payouts?
Shopify Payments → 1–2 days
PayPal → immediate (but holds possible)
6. Based on Risk Management
Stripe typically provides more transparent risk review than PayPal.
A combination of multiple gateways is usually the optimal approach.
Step-by-Step: How to Add Any Payment Gateway in Shopify
Regardless of the gateway you choose, the setup process follows similar steps.
1. Open Shopify Payments Settings
Go to Settings → Payments.
2. Choose a Payment Provider
- For Shopify Payments: Select Activate Shopify Payments
- For PayPal: Select PayPal Express Checkout
- For Stripe or others: Choose Third-party providers
3. Verify Your Business Information
Most gateways require:
- Full legal business name
- EIN/Tax ID (U.S. only)
- Identity verification
- Bank account details
4. Configure Currencies
Activate currencies based on your target markets.
5. Enable Test Mode (Optional)
Useful to simulate transactions before launching the store.
6. Test Checkout
Always perform:
- Credit card test
- PayPal test
- Apple Pay or Google Pay test
7. Publish Store
Once everything works, your payment setup is complete.
Best Practices to Boost Conversion and Reduce Payment Failures
Offer Multiple Payment Methods
Providing at least three options significantly increases the likelihood of checkout completion.
Recommended setup:
- Shopify Payments
- PayPal
- One BNPL option
- Apple Pay & Google Pay
Enable Express Checkout Buttons
Shop Pay, PayPal Express, and Apple Pay increase mobile conversions dramatically.
Optimize for Mobile Devices
Over 65% of Western ecommerce traffic comes from mobile users.
Reduce Fraud Flags
Use Shopify Fraud Protect (if available) and Stripe Radar to reduce false declines.
Keep Chargebacks Low
- Provide clear refund policies
- Use tracked shipping
- Respond to disputes quickly
- Upload supporting evidence
Communicate Payment Options Clearly
Add payment badges to:
- Homepage
- Product pages
- Footer
- Cart page
Trust symbols improve conversions.
Setting up payment gateways in Shopify isn’t just a technical step—it’s a strategic decision that directly shapes your customer experience, conversion rates, and revenue. By implementing the right combination of Shopify Payments, PayPal, Stripe, and local or BNPL options, you can build a checkout experience that works seamlessly across the U.S., UK, Canada, Europe, and beyond.
Whether you’re a new merchant or scaling an established brand, following the steps and best practices in this guide will help you create a trustworthy, optimized payment system that supports your long-term growth. With the right payment gateways in place, your Shopify store will be ready to convert more customers—and boost your bottom line.
Leave a Reply